
How to Install and Configure an OpenLDAP Ubuntu Server
2024-03-25 15:00:00
Installing and Configuring the OpenLDAP Client
Now that you have a great server setup, you need a way to interact with IT by installing and configuring the OpenLDAP client. Setting up this client is essential for enabling centralized authentication and resource access across your network.
Integrating your Ubuntu system with the LDAP directory server establishes a unified authentication mechanism, enhancing security and simplifying user management.
To install and configure the OpenLDAP client, follow these steps:
1. Execute the following sh command to add the OpenLDAP server’s hostname and IP address to your client machine to the /etc/hosts file, allowing hostname-based communication.
Remember to replace 192.168.1.7 and ldap.ata.com with your server’s IP address and hostname.
sudo sh -c 'echo "192.168.1.7 ldap.ata.com" >> /etc/hosts'
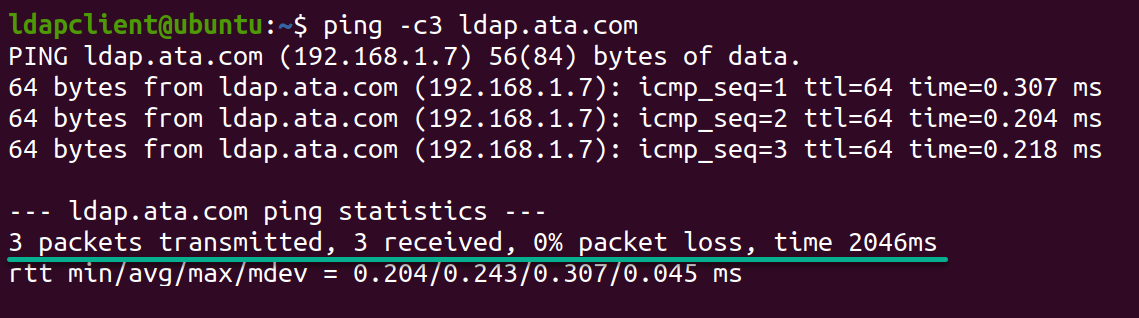
2. Once added, run the below ping command to check the connectivity between your system and your OpenLDAP server (ldap.ata.com).
The output below confirms the client machine can successfully communicate with the OpenLDAP server using the specified IP address and hostname.
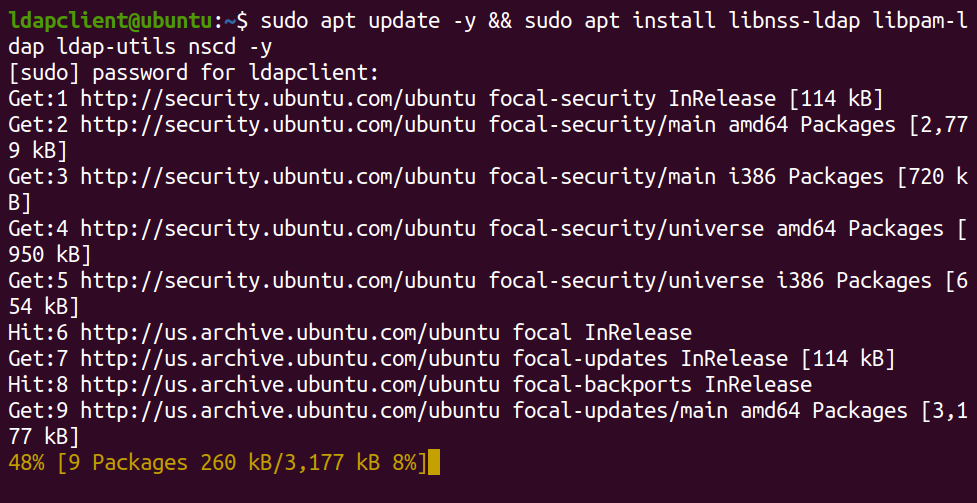
3. Next, run the command below to update your package lists and install the following necessary OpenLDAP client packages:
libnss-ldap– Enables your system to use LDAP for common configuration databases.libpam-ldap– Allows system authentication against LDAP directories.ldap-utils– Provides command-line tools for managing LDAP directory entries.nscd– Caches NSS lookups, improving performance by reducing LDAP server queries.
sudo apt update && sudo apt install libnss-ldap libpam-ldap ldap-utils nscd -yDuring installation, you will get a series of prompts to configure the OpenLDAP client (step four).
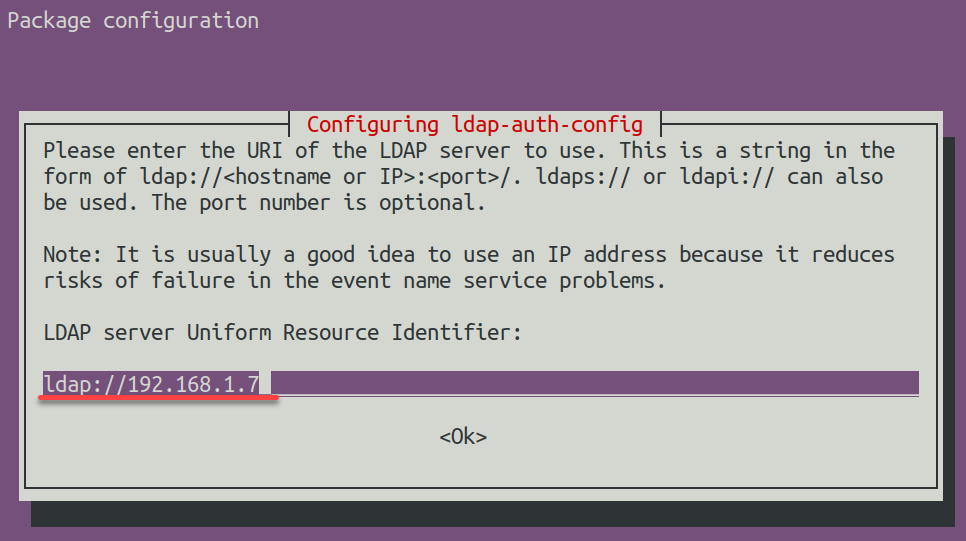
4. Now, enter ldap://192.168.1.7 in the LDAP server Uniform Resource Identifier field, which directs the client to your OpenLDAP server.
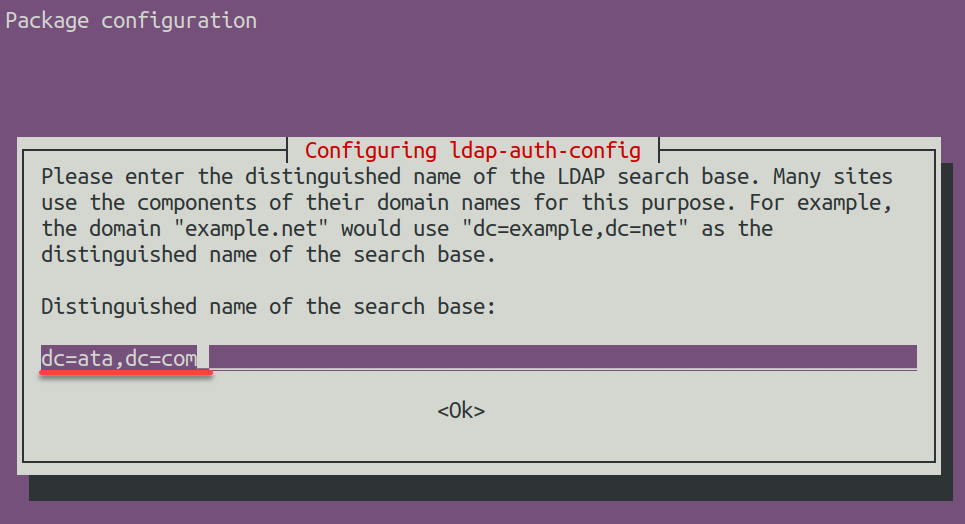
5. Input the DN of the search base (i.e., dc=ata,dc=com) for LDAP operations.
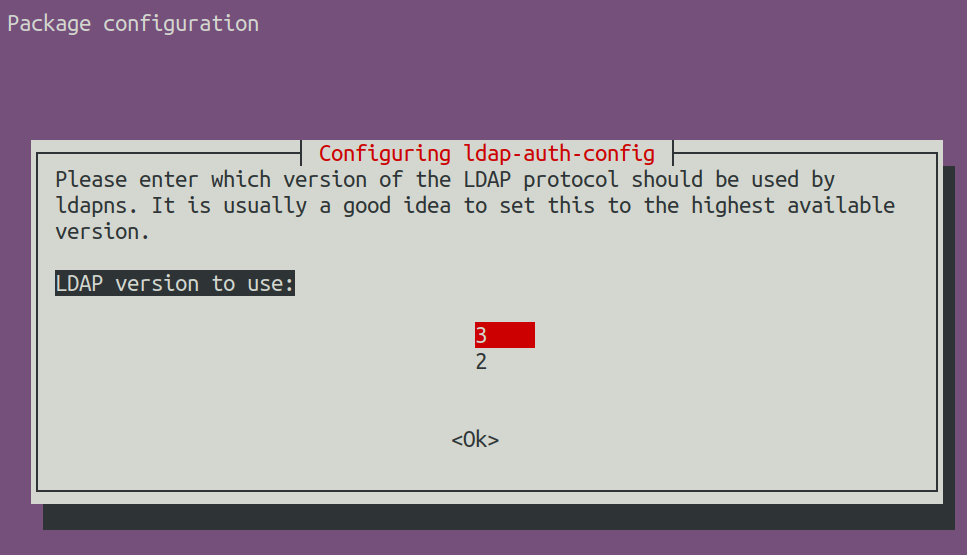
6. Choose 3 for the LDAP version to use for enhanced security and features
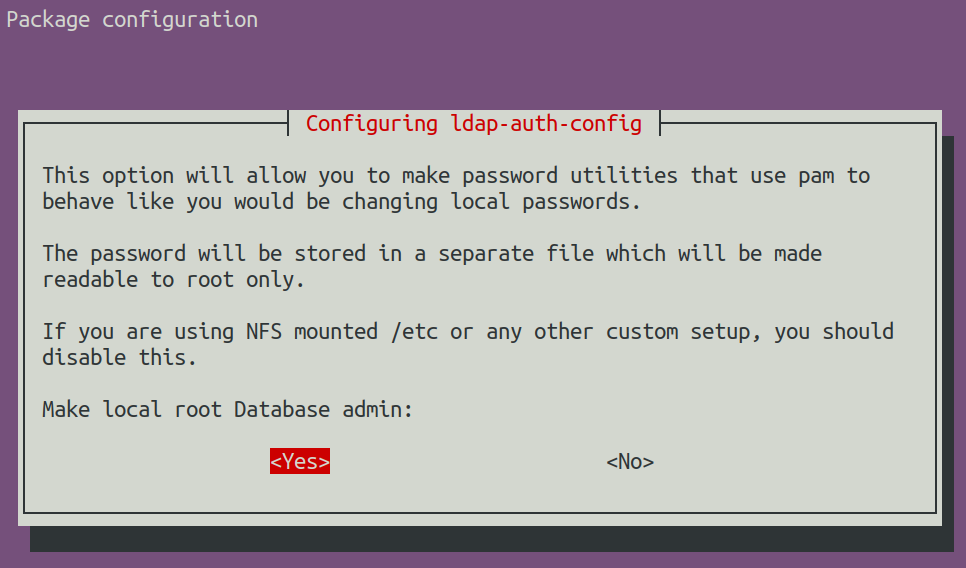
7. Next, select Yes to give the root user database admin privileges.
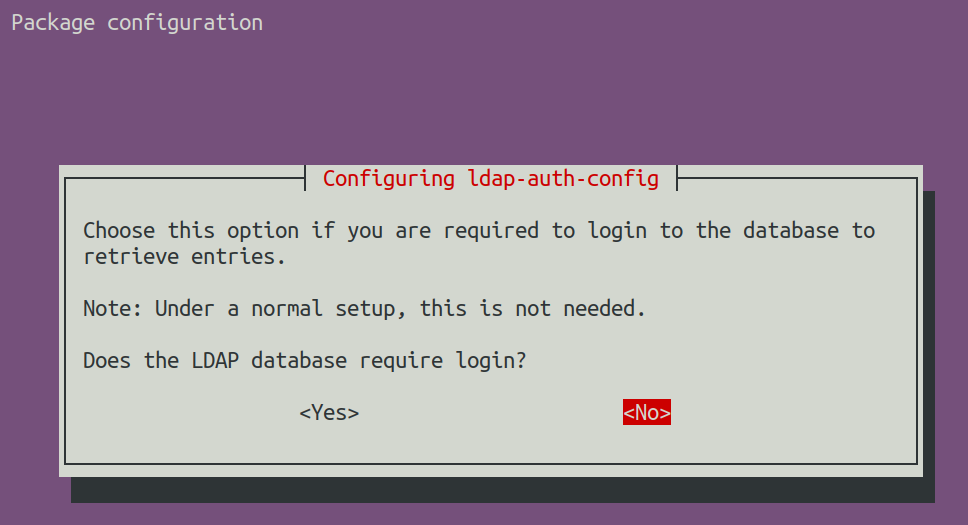
8. Afterward, choose No for root account management to disable the LDAP database login.
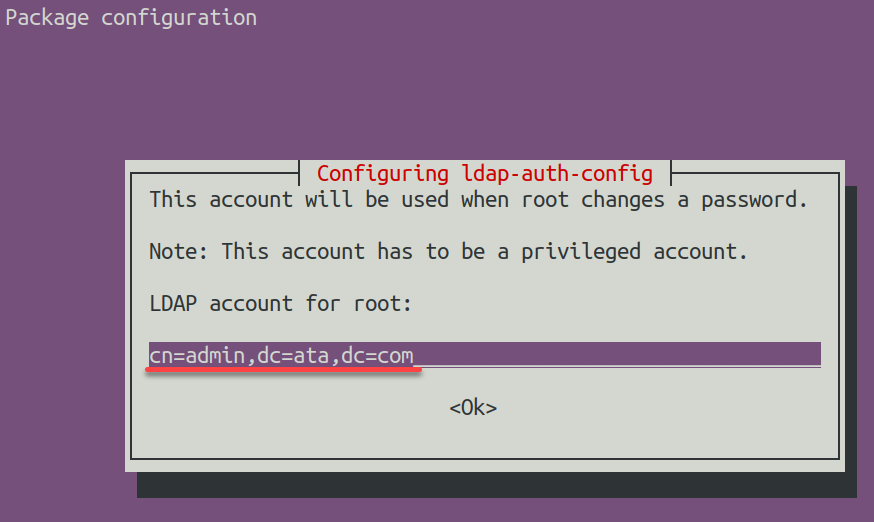
9. Input the LDAP account for root (i.e., cn=admin,dc=ata,dc=com). This configuration specifies the admin account for managing LDAP.
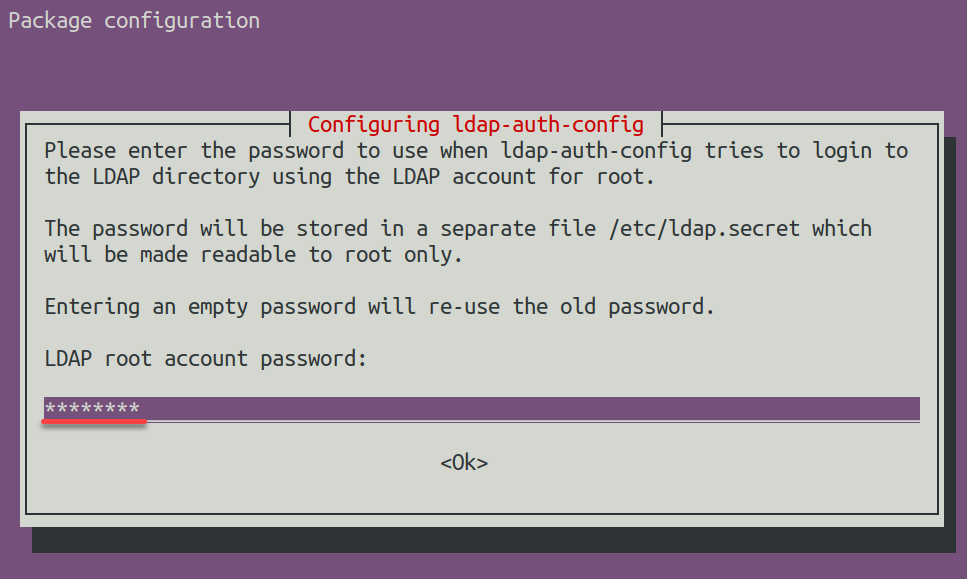
10. Provide a strong LDAP root account password (admin password).
11. After the client configuration, open the /etc/nsswitch.conf file in your preferred editor (i.e., nano or vim) to configure your system’s name service switch.
This file decides the pecking order for where the system looks up stuff like user accounts, groups, hosts, and services.
12. Change the value of the following lines in the /etc/nsswitch.conf file to include the following:
compat – Refers to local files like /etc/passwd.
ldap – Specifies the use of LDAP.
This configuration allows the use of LDAP user authentication and other system functions
passwd:         compat systemd ldap
group:          compat systemd ldap
shadow:         compat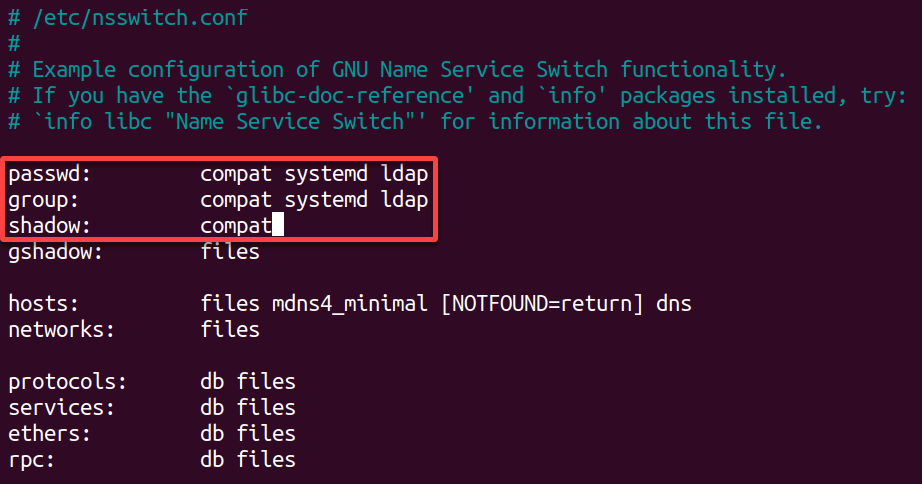
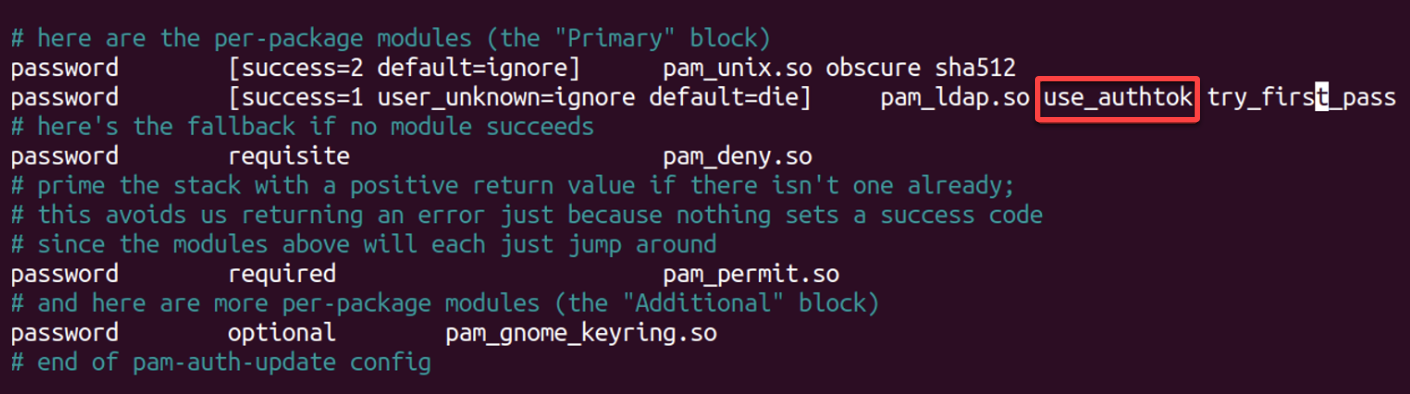
13. Now, open the /etc/pam.d/common-password file, locate and remove the use_authtok option, as highlighted below, save the changes, and close the file.
This action lets you adjust the PAM password settings to use the password provided by the user.
14. Additionally, open the /etc/pam.d/common-session file, add the following line and save and close the file.
Upon user login, this configuration adds automatic home directory creation to ensure user home directories are created with proper permissions.
session optional pam_mkhomedir.so skel=/etc/skel umask=077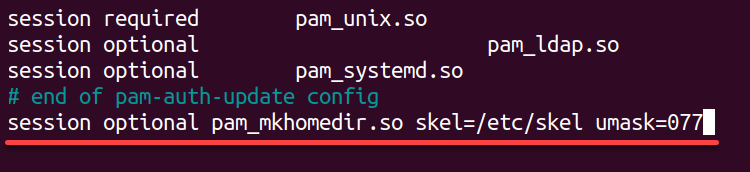
15. Lastly, run the command below to restart the Name Service Cache Daemon (nscd) and apply the configuration changes.
sudo systemctl restart nscd[Contact Techihaus for get solution for your startup]
Source link